Showing posts with label DBA. Show all posts

Monday, September 9, 2019

TKPROF


TKPROF
TKPROF command (tkprof tracefile.trc tracefile.tkp) used to decode the tracefile in desired file format.
For this first of all we have to set environment variable and then run the command tkprof tracefile.trc tracefile.tkp as shown in figure.
tkprof
tkprof

Thursday, March 14, 2013

lp: Too many active jobs

Problem: Unable to print documents on Linux due to "Too many active jobs"

Solution:
1-Log in through root user
2- Delete files form "/var/spool/cups"
# cd /var/spool/cups
# rm -rf *

3- Restart CUPS server.
#  /etc/init.d/cups restart

4- Retest the issue.

Thursday, January 10, 2013

Tkprof - Convert Trace .trc To Readable

Tkprof - Convert Trace .trc To Readable


Here is the syntax of tkprof command.

tkprof <file.trc> <file.tkprof> explain=<apps_user>/<pswd>

Here,

 tkprof: is command
<file.trc>: is file name of trace file with location (if currently not in same directory)
<file.tkprof>: is output file name
explain=<apps_user>/<pswd>: provide apps user name and password.


For Example:


tkprof /usr/tmp/oracle.trc /usr/tmp/output.tkprof explain=apps/****

Wednesday, November 28, 2012

The chosen installation conflicts with software already installed

The chosen installation conflicts with software already installed


This Sunday when I was trying to install Oracle 11g Database I was facing following problem while installing the database.

[INS-32025] The chosen installation conflicts with software already installed in the given Oracle home
INS-32025 The chosen installation conflicts with software already installed

This error occurs because I have already installed the Oracle 11g Database and later I have remove the Oracle 11g Database and restored my registry. But when I again try to install the database, installer found any traces of previous installation somehow and show the error.

Solution:

I have just change the dbhome_1 to dbhome_2 and problem solved. :)

Reason:

Installer found the entry of dbhome_1 from anywhere in my system and when again I tried to installed the same home installer showed the error. So I just change the home name.

Suppose:

If you install this and later you uninstall the db then next time when you will try to install the Oracle 11g Database you will have to use the "dbhome_3". Hope you got the point. :)
INS-32025 The chosen installation conflicts with software already installed


Tuesday, November 27, 2012

file not found em.ear oracle 11g

file not found em.ear oracle 11g


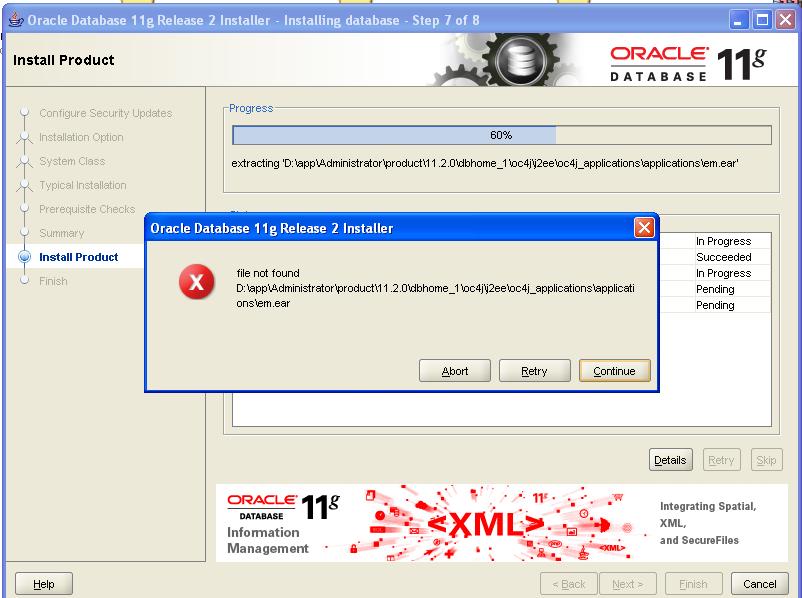
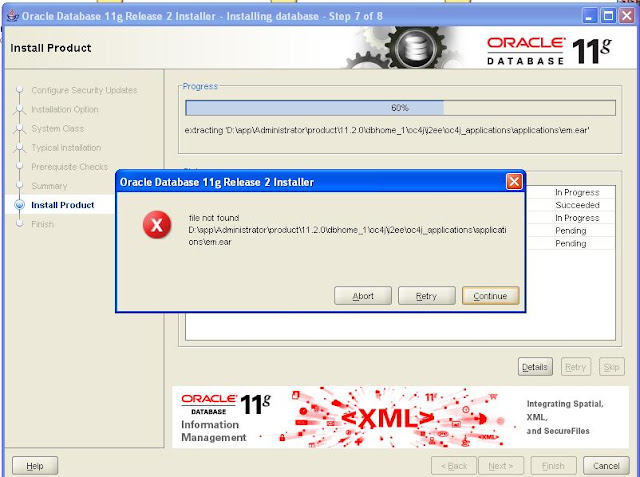
This Sunday I was trying to install Oracle 11g Database but at 60% it showed error:
file not found em.ear oracle 11g

"Oracle Database 11g Release 2 Installer
file not found
d:\app\Administrator\product\11.2.0\dbhome_1\oc4j\j2eoc4j_applications\applications\em.ear"

When we download Oracle 11g Database it contains 2 files win32_11gR2_database_1of2.zip and win32_11gR2_database_2of2.zip.
What I was doing wrong is, I just unzipped the first file and assumed it automatically will extract the second one too but actually it won't. That is why I was getting this error.


I have googled a lot and found the solution:

Solution:

Extract first file ( win32_11gR2_database_1of2.zip) and then second (win32_11gR2_database_2of2.zip) too. win32_11gR2_database_2of2.zip automatically placed its files in Components directory if you still facing this error then extract the 2nd file (win32_11gR2_database_2of2.zip) and place the extracted folders (oracle.ctx, oracle.rdbms.install.seeddb, oracle.sysman.console.db) into database\stage\Components.
I am confident it will solve your problem.
If you still facing the problem then please comment below.


Friday, June 22, 2012

Oracle: Auto Backup


Oracle Auto Back up


  1. Create ‘filname.sh’ file with following code anywhere in server after amendments. (Possible amendments in RED.) e.g. filename is make_db.sh. 
#!/bin/bash 
# 
# 
dy=`date +%a` 
hn=`hostname` 
bk='/opt/back' 
sb=$bk'/'$hn 
# 
#!/bin/bash 
# 
# 
dy=`date +%a` 
hn=`hostname` 
bk='/opt/back' 
sb=$bk'/'$hn 
# 
# 
cm_d01='tar -Pczf '$sb'/'$hn'_'$dy'_d01.tar.gz /opt/d01'       
cm_d02='tar -Pczf '$sb'/'$hn'_'$dy'_d02.tar.gz /opt/d02'       
cm_d02_da='tar -Pczf '$sb'/'$hn'_'$dy'_d02_data.tar.gz /opt/d02/oracle/proddata'   
# 
# 
dy1="Tue" 
dy2="Wed" 
dy3="Thu" 
dy4="Fri" 
dy5="Sat" 
dy6="Sun" 
dy7="Mon" 
both_bk_on=$dy7 
# 
# 
printf "\n" 
if test -d /opt/d01 ; then 
  printf "Source Folder d01 Exist ............... OK\n" 
  if test -d /opt/d02 ; then 
    printf "Source Folder d02 Exist ............... Ok\n" 
    if test -d $bk ; then 
      printf "$bk Folder Exist ............... Ok\n" 
    else 
      printf "Going to create $bk Folder\n" 
      mkdir $bk 
    fi 
    if test -d $sb ; then 
      printf "$sb Sub Folder Exist ............... Ok\n" 
    else 
      printf "Going to create $sb $ub Folder\n" 
      mkdir $sb 
    fi 
#   ------------------------------------------------------------------ 

    printf "Going to create tar file for d02 \n" 
    /home/oracle/down.sh 
    ls -l /opt/d02/oracle/proddata > $sb/list"_"$hn"_"$dy"_d02_b4.txt" 
    if test "$dy" = "$both_bk_on" ; then 
    $cm_d02 
   else 
   $cm_d02_da 
  fi 
    ls -l /opt/d02/oracle/proddata > $sb/list"_"$hn"_"$dy"_d02_aft.txt" 
    tar -tzvf $sb"/"$hn"_"$dy"_"d02.tar.gz > $sb"/list_"$hn"_"$dy"_d02_tar.txt" 
    if test "$dy" = "$both_bk_on" ; then 
      printf "Also going to create tar file for d01\n" 
      $cm_d01 
    fi 
    /home/oracle/up.sh 
#   ------------------------------------------------------------------ 
  else 
    printf "Source Folder D02 Does Not Exist\n" 
  fi 
else 
  printf "Source Folder d01 Does Not Exist\n" 
fi 


  1. Now we will edit CRONTAB utility according to our requirement. Crontab is just like a scheduler. (See basics of CRONTAB at the end.) 
  2. Add this line in CRONTAB ‘00 21 * * * /opt/back/make_db.sh 
The above line will automatically run the make_db.sh file everyday at 21:00. 


Manual Bakcup 


This document will guide you to take backup of single Tier R12. DB and Apps combine. Incase you are working on multi node repeat the steps for DB and Apps server separately. 

Take Backup 

  1. Go to the directory where you want to place the backup...e.g. /opt/back. 
  2. Down services. (So that no further live entries should made and it will speedup the process) 
  3. Now take the backup as followed. 
tar -Pczf haseeb_oracle_04apr11.ar.gz /opt/haseeb_oracle/ 
(where tar -Pczf are the keywords then target folder with backup file name and then source folder with path(of which you want to take backup.)) 
  1. Backup done. 

Place Backup 

  1. Go to the path where you want to place the extracted file.(target folder) and run the following command 
tar -xzf back/haseeb_oracle_04apr11.ar.gz 
  1. This will place the your extracted files in that directory. 
  2. Now move the files accordingly so that your directory structure remains the same. 
In my case when I extracted the files it creates the ‘opt’ folder in existing ‘/opt’ folder (make sure there is hell off difference in '/opt' and 'opt/'. In '/opt','/'itself is directory.) 
While I need to retain the file structure like opt/oracle/. 
So I will remove the existing 'oracle' directory from '/opt' and move the oracle directory from 'opt/' to '/opt'. 
Now I’ll have the exact file structure what I need to have. 
All done. 
All the best. 


Your feedback/comment is quite important for improving this blog so feel free to leave your comments & suggestions